


Today I am going to show you how you can trick your sewing machine into doing over-sized button holes.
My old sewing machine had the old-style four step button hole. When I got my new sewing machine, one of the features that I was really excited about was the automatic button-hole feature. Now, I just plonk a button in the slot and push a few buttons, press start and away we go. Perfect button holes to perfectly fit my buttons.
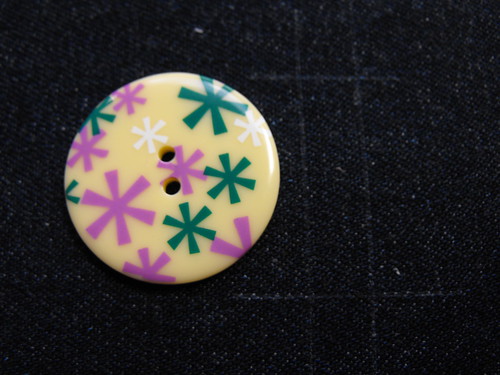
Then, when I made Amélie's Serendipity Coat, with those lovely big buttons, I discovered that not all was fantastic with the automatic button hole feature. Ugh! Those buttons won't fit in that slot! So here's what I did...
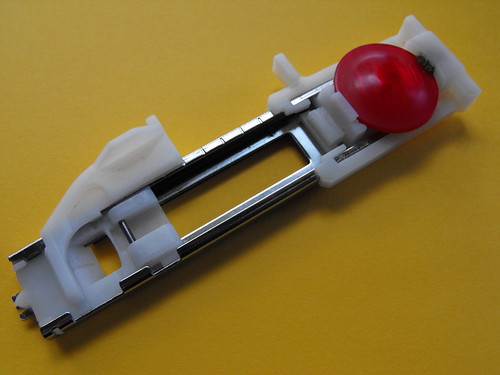
The first thing you should know is that the "automatic buttonhole" is still kind of like a four step button hole. Instead of you doing the button pressing or knob turning, the button-hole foot does all the work.

Grab yourself an erasable fabric marker*, (the one I'm using in this tutorial is a white one that is made by Clover - great for dark coloured fabrics like denim) and mark out where you want your button-hole.
Now extend those starting and finishing points out to the right, so that you can see them beyond the edges of your machine's foot. Place another line, parallel to the buttonhole position, to the right, so that you can see where you are heading when you are sewing your button-hole. My parallel line is about 3/8" away from the marked button-hole line. This puts it just outside of the edge of my presser foot, so I can easily line things up and keep my button hole nice and straight.
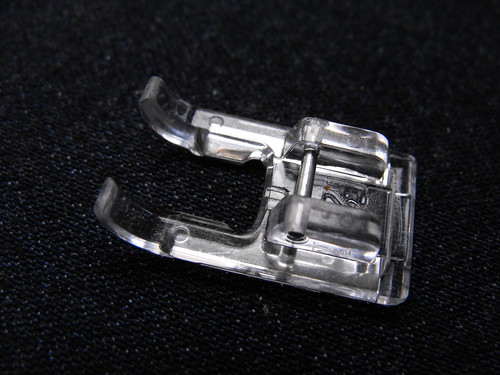
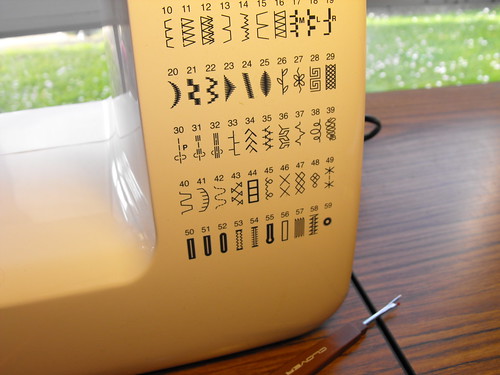
Pop a regular presser foot on your machine, or if you have one, an embroidery foot, because it won't catch on your button hole stitches and it's nice and easy to see what is going on. Set your machine up to do button-holes and lower the black lever.
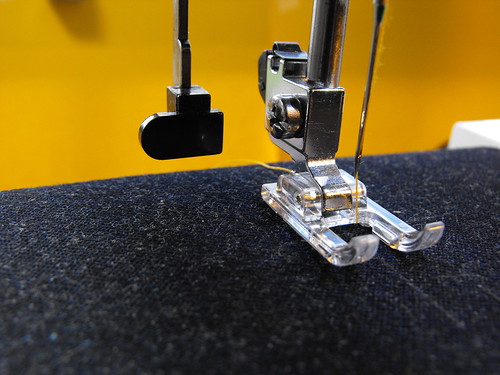
The black lever is key here. My button-hole stitches won't work at all unless that lever is down, because that lever tells the machine when each "step" is finished and when to begin the next "step". The lever acts like a button/switch/knob, and the automatic btton-hole foot, when you use it, acts like your finger, pressing the black lever "button" as it goes. For over-sized buttons, we push the lever, in the same way that the button-hole foot does.
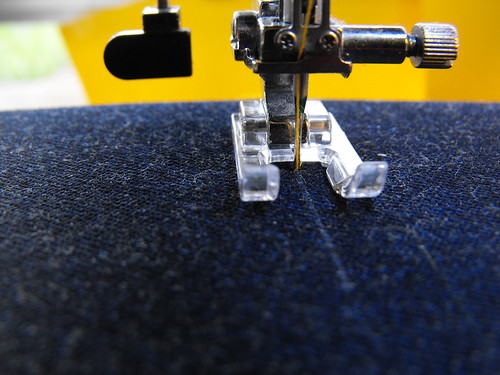
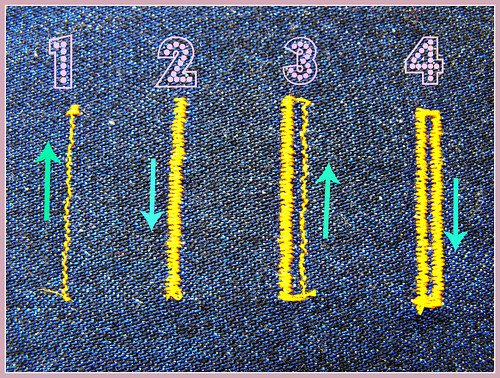
Starting with most of the button-hole under the foot, and the front edge lined up with the needle, (remembering that button-holes are sewn backwards!) lower your needle and begin to sew. I don't use the "start" button for these button-holes. I like to have a bit more control over the speed, so I use the pedal.
When you reach the line at the end of your marked button-hole, press the lever from the back. That is, push the lever towards you.

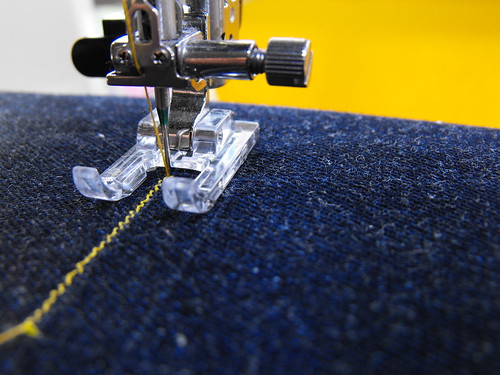
When you reach the front edge of your button-hole, push the lever from the front, that is, push the lever away from you.

When the machine reaches the line again, push it from the back, as before. You will need to repeat this, pushing the lever in the direction you want the stitching to go. Please bear in mind that the amount of lever pushing, and the direction will vary from machine to machine and from button-hole style to button-hole style.
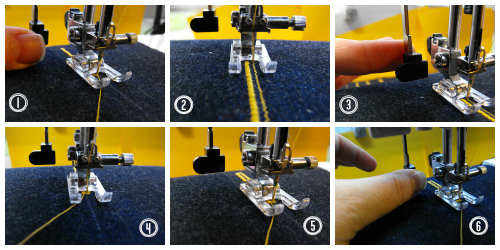
The last step is to push the button backwards and then sew the bit that goes across the front end. Voila! Finished button-hole! Well, once you open it, it is...

Now, if you want to do this yourself, I suggest that you have a few practise runs with some scraps before you tackle your actual project.
*Always test a disappearing ink pen on a scrap of your fabric first to make sure that it disappears and never iron over disappearing ink as it may cause it to become permanent!
What a clever work-around! Thanks for the tip xx
ReplyDeleteAh ha! I tried this once, but couldn't get it to work. Turns out I was pushing the black knob thing when I should have been pulling it! Will have to try again, thanks! I always seem to pick buttons that are bigger than the auto foot.
ReplyDeleteNot only are you super clever for working out the buttonhole, you do an awesome tutorial too!
ReplyDeletegenius
ReplyDeleteNice tutorial ! My machine doesnt have a automatic button holer , So I use this technique..
ReplyDeleteTHANK YOU!!!!
ReplyDeleteYou're welcome :)
DeletePerfect, thank you!
ReplyDeleteGreat tutorial Carmel!
ReplyDeleteFor my babylock machine I found that the direction of stitching would only change if it was actually stitching when I pulled/pushed the lever. So stitching slowly at the ends is a must for me! I use this method to make giant buttonholes in towel holders for my kitchen knobs. Great Tute!
ReplyDeleteI found that this would only work if the the machine was stitching when I pushed/pulled the lever. So try that if you're having difficulty. Just stitch slowly so you know when to touch the lever. I use this method to make large buttonholes on towel holders for my kitchen knobs (as opposed to pulls). Great tute!
ReplyDeleteHello SCREEM SCREEM the first side of the button hole great it comes down the other side and then half way up the button hole it does a bar - help what am I doing wrong
ReplyDeleteHello - can anybody help - the first side goes really well then as I am doing the second side it decides to finish the buttonhole half way along - what am I doing wrong anybody?????
ReplyDeleteHi Janet, does it do it the same every time? It sounds like your machine thinks it has reached the end for some reason. Is there any chance you have bumped the lever? It is really easy to do. I hope you can work it out.
DeleteHi Carmel - thank you so much for replying. I am trying to put buttonholes into rather thick (double thick fleece) which may be the problem. I will have another go tomorrow.
DeleteYou saved my night! Thank you. This was the perfect solution and worked like a charm. I can't blog about my project/pattern test until the designer releases the pattern, but when I do, I will be referring people to this post! Sew-not-perfect.blogspot.com
ReplyDeleteI usually don't post comments but I felt compelled. This is genius!!! I have a large button he that was needed to create an opening for a belt and I couldn't figure out what to do. Also my automatic button hole maker was not working anyway! I practiced a few times and your technique worked like a charm. You saved the day !!!!! Thanks again
ReplyDeleteYou're welcome, Nadine. I love that my tutorial helped you.
DeleteThank you so much for this! I have been sewing for 30 years and NEVER knew I could do that this way.
ReplyDeleteI'm reading the directions, but I'm confused. So you push the lever back sew until your button hole length, then you push it forward to finish? I'm confused?
ReplyDeleteCould you possible post a video tutorial?
I was thinking I could just do two button holes in a mine and cut through the middle part?
I wish Singer would just make a 2" button hole foot!!!
Thanks!
Jodi
Wonderful! Thank you so much. finally can finish my backpack.
ReplyDeleteThank you so much for this great tutorial Carmel. I'm putting 18 very large buttons on cushion closures, and this will save me having to make bound buttonholes. Just one little question: when you push/pull the buttonhole lever do you let go or hold it in that position as it continues to stitch?
ReplyDeleteYou are a genius. And, I can now make a large custom buttonhole and I didn't spend any money!
ReplyDeleteFor my Janome 8200, the initial straight stitch line on the left going backwards does not lock, but that doesn't matter as the satin stitches come out just fine. Also, I beefed up the bar tacks on the top and bottom of the buttonhole by doing a simple wide, dense zigzag for 6 stitches or so.
I can get one side to sew, but my machine never moves across to sew the other. Pushing back and forth just makes it stay on that one side. Any suggestions?
ReplyDeleteI'm really not sure. What machine do you have? Does it work properly when you use the automatic buttonhole foot?
Delete